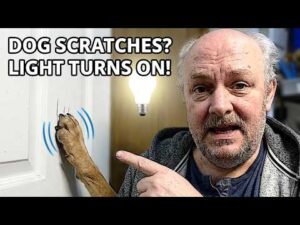
Ever wished your dog could tell you when they want to go out… without scratching the door to pieces? In this video, I show you how I built a simple Home Assistant automation that reacts the moment my dog scratches at the back door — turning on a light so I know he’s waiting.
This is a fun, practical smart‑home project using a vibration sensor, Zigbee, and Home Assistant. If you’ve got pets, this might be the most useful automation you ever add.
What you’ll see in this video:
• How to detect dog scratching using a vibration sensor
• How to trigger lights or notifications in Home Assistant
• How to set up the automation step‑by‑step
• Why this is a great beginner smart‑home project
• A real‑world example that actually works
A cop just knocked on my door and told me that my dogs were chasing people on bikes. My dogs don’t even own bikes…
So, you’ve just installed Home Assistant… and now you’ve caught the Zigbee bug. Before you accidentally spend £200 on AliExpress “because it was only £2.30,” this video walks you through the actual beginner‑friendly way to start Zigbee in Home Assistant — without blowing your cover with your partner.
In this video, I show you:
• The cheap Zigbee devices worth grabbing
• The Zigbee coordinator you should start with (SLZB‑07)
• How to set it up in Home Assistant (ZHA)
• How to pair sensors, plugs, and other devices
• What to do when pairing goes weird
• Why Zigbee is still miles ahead of Matter/Thread for beginners
If you’re new to Zigbee, this is the full setup guide I wish I had when I started — simple, cheap, and actually works. #Zigbee #HomeAssistant #SmartHome #HomeAutomation #ZHA #ZigbeeSetup #SmartHomeUK
Matter and Thread devices are supposed to “just work”… but judging by the error messages, they didn’t get the memo.
In this video, I walk you through three levels of troubleshooting — from the simple stuff you can fix in seconds, all the way to the nuclear “here be dragons” option that resets Google Play Services and breaks half your phone. Yes, really.
Here’s what we cover:
1️⃣ Easy Fixes
• Bluetooth ON
• 2.4GHz Wi‑Fi
• IPv6 enabled in Home Assistant The basics that Matter never tells you, but absolutely relies on.
2️⃣ Medium Fixes
• Syncing Thread credentials on your phone
• Checking your Thread Border Routers
• Making sure Home Assistant isn’t clinging to old routers you threw away years ago
3️⃣ The Nuclear Option
• Clearing Google Play Services data
• Why it works
• Why it breaks everything
• Why you should only do it if you’re at your wit’s end
I also talk about why Matter and Thread should be brilliant… but still feel half‑baked compared to Zigbee. Spoiler: Zigbee still wins for reliability, mapping, and general sanity.
If you’re fighting with Matter/Thread devices, this guide will save you hours — and possibly your phone.
In this video, I walk through the full setup of Thread OBR (Open Thread Border Router) running directly on the SMLight SLZB‑MR3U — no USB passthrough, no extra hardware, and no Home Assistant add‑on required.
This update lets the SMLight SLZB‑MR3U run Zigbee AND Thread in one device, making your smart home cleaner, faster, and easier to manage. I show the firmware update, configuration steps, Home Assistant integration, Matter pairing, and how to get your Thread devices connected through the new onboard OBR.
If you’re using the SMLight SLZB‑MR3U or planning to upgrade your smart home network, this guide will walk you through everything step‑by‑step.
In this video, I show you how to set up the SMLight SLB MR3U, a dual‑radio smart‑home controller that lets Zigbee and Matter over Thread work together seamlessly inside Home Assistant.
We unbox the SMLight MR3U, power it up, find it on the network, configure both radios, and integrate it with Zigbee2MQTT and the Thread Border Router add‑on. I also walk through pairing a Zigbee temperature sensor and a Matter smart plug — and demonstrate both protocols talking to Home Assistant at the same time.
If you’re building a modern smart home and want Zigbee reliability and Matter compatibility in one device, this guide will get you fully set up.
📌 What’s inside:
• Full SMLight SLB MR3U setup walkthrough
• How Zigbee + Matter over Thread work together
• Finding the SMLight MR3U on your network
• Configuring Zigbee2MQTT with the new controller
• Installing and configuring the Thread Border Router
• Pairing Zigbee sensors and Matter devices
• Verifying everything in Home Assistant
• Troubleshooting pairing and USB passthrough in Proxmox If this helped,
hit LIKE and SUBSCRIBE for more Home Assistant, Zigbee, Matter, and smart‑home tutorials.
Running out of Google Drive space for your Home Assistant backups? Tired of paying £11/month for extra google storage? This complete OneDrive for Business setup guide is designed to help you integrate Microsoft’s cloud storage solution with your Home Assistant, providing a reliable and secure backup solution for your home automation system.
If you’re experiencing issues with Google Drive backup or looking for an alternative cloud storage option, this tutorial will walk you through the process of setting up OneDrive for Business with Home Assistant, including app registration with Microsoft Entra and configuring secrets for secure backup.
By following this step-by-step guide, you’ll be able to leverage the benefits of OneDrive integration and enjoy a seamless cloud backup experience for your Home Assistant, ensuring your home automation data is safe and easily accessible.
With the latest Home Assistant March 2026 release, it’s essential to have a robust cloud storage solution in place, and this video will show you how to achieve that with OneDrive for Business, providing a comprehensive storage solution for your home automation needs and giving you peace of mind with regular backup tests and a reliable cloud storage system. By the end of this video, you’ll have a fully functional OneDrive for Business setup for your Home Assistant, complete with Microsoft Entra app setup and configuration, allowing you to focus on what matters most – enjoying your smart home with the confidence of knowing your data is securely backed up in the cloud.
In this video, I walk through how to back up Home Assistant to OneDrive for Business, now supported as of the March 2026 release. Backups are so important – If things go wrong, they are what you fall back on You should always try to keep a backup in a remote location I show the full setup process:
• Creating a folder in OneDrive
• Registering an app in Microsoft Entra
• Setting up permissions and secrets
• Connecting OneDrive to Home Assistant
• Switching off Google Drive backups
• Running a manual backup to test it
This guide is perfect if you already have a OneDrive for Business account and want to avoid paying for extra cloud storage. I also explain the difference between client ID, application ID, and secret values — and how to avoid common setup mistakes.
Take your smart home further by extending Zigbee2MQTT all the way to your garage using the SMLIGHT SMHUB Nano.
In this video, I walk through the full setup, configuration, and integration process so you can reliably connect Zigbee devices at the edge of your property — without range issues or flaky repeaters.
You’ll see how to:
• Set up the SMHUB Nano
• Connect it to Zigbee2MQTT
• Bridge it back to your main Home Assistant system
• Test communication between the house and garage
• Troubleshoot common pairing and range problems If you’re building a distributed smart home or want rock‑solid Zigbee coverage outdoors or in outbuildings, this guide will help you get it done.
You can buy one :-
UK Amazon – https://amzn.to/4lesILH
International – https://www.aliexpress.com/item/1005010395615513.html
In this video I unbox, set up, and fully test the Meross MS600 Matter & Thread Smart Presence Sensor. Meross sent this to me for review, but they haven’t asked me to say anything specific — so you’re getting the honest version.
I walk through the entire setup process, including the slightly fiddly Matter onboarding, resetting the device, scanning the code, and getting it into Home Assistant. Once connected, I explore the three occupancy zones, illuminance readings, and how the sensor reacts to real‑world movement… including my dogs constantly triggering it.
I also test the MS600’s IP67 waterproof rating, looking at whether it could work in a bathroom, shower area, or even outdoors for smart lighting. I show how to tune detection distances, adjust sensitivity, and use the Meross app to configure radar, PIR, and mixed modes.
Finally, I cover the good, the bad, and the ugly — including the unusual battery type — and share the discount code Meross provided.
If you’re considering the MS600 for Home Assistant, bathroom automations, or outdoor lighting, this video shows exactly what to expect. 📌 Discount code US / CA / AU: New Meross Thread Smart Presence Sensor, MS605
EU & Other Regions: https://shop.meross.com/products/smart-presence-sensor-ms605?ref=eguprokv
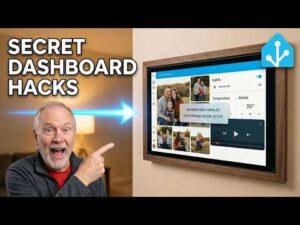
Transform your wall tablet into the perfect smart display! In this video, I pull everything together — dashboards, photos, presence detection, Browser Mod, helpers, and automations — to create a fully automated Home Assistant wall display that switches between a dashboard and a photo frame automatically.
We set up:
• A multi‑tab dashboard (Dashboard, Photos, Cameras)
• Browser Mod navigation
• A dropdown helper to control what’s shown
• Automations that switch tabs based on helper state
• Presence‑based switching between dashboard and photo frame
• A startup script to always load the correct view
Whether you’re building a smart home control centre or a beautiful digital photo frame, this walkthrough shows you exactly how to automate it.
Learn how to build a clean, full‑screen Home Assistant dashboard using the February 2026 release. In this step‑by‑step tutorial, I walk through creating a new dashboard, adding multiple tabs, setting custom backgrounds, installing Browser Mod, and configuring Photo Frame for full‑screen images when you’re away from the panel.
You’ll see how to safely use Browser Mod without locking yourself out, how to hide the sidebar and header, and how to create navigation buttons using Mushroom Templates. I also show how to set up a media folder, configure configuration.yaml, and link Photo Frame to your images so they display automatically.
Whether you’re building a wall‑mounted tablet dashboard or refining your smart home UI, this guide gives you the full workflow from start to finish.
What you’ll learn:
Creating a new Home Assistant dashboard
Adding tabs for Dashboard, Photos, and Cameras Setting custom backgrounds using Pexels textures
Installing and configuring Browser Mod Safely hiding sidebar & header for a clean UI
Adding navigation buttons with Mushroom Templates
Installing Photo Frame via HACS Setting up media folders and YAML configuration
Displaying full‑screen photos when away from the dashboard
Preparing for automation that switches views based on presence
Useful links
https://www.pexels.com/search/background%20abstract/
https://community.home-assistant.io/t/photoframe-custom-card/931725
https://github.com/thomasloven/hass-browser_mod
This is part 2 of a multi‑video series where we build a fully automated, presence‑aware dashboard that switches between photos and controls depending on where you are in the room.