
Video thumbnail for MONSGA MR7 Pro – Does It Suck? Robot Vacuum + Home Assistant

MONSGA MR7 Pro – Does It Suck? Robot Vacuum + Home Assistant

Meet Valerie, the MONSGA MR7 Pro robot vacuum.

This video finds out whether a robot vacuum costing just over £200 is actually any good and, importantly, whether it works with Home Assistant.

It covers setup with Smart Life, LiDAR mapping, splitting the map into individual rooms, vacuuming a genuinely dirty carpet, mopping, and adding the MR7 Pro to Home Assistant using Tuya Local for local control and automations.

The vacuum cleans well but mopping is more like dragging a wet cloth than scrubbing. It can occasionally get stuck and may need more than one pass, but it offers impressive performance for the price.

With Home Assistant control, it can automatically start cleaning when nobody is in the room and return home when somebody comes back.

MONSGA MR7 Pro: https://lasso.to/tpB6U991C2

If you use this or another robot vacuum with Home Assistant, share your automations in the video comments.

Chapters:

00:00 MONSGA MR7 Pro – Does It Suck?
00:30 Meet Valerie
01:05 Unboxing and First Look
02:43 Smart Life App Setup
03:39 Wi-Fi Pairing Mode
04:47 Connecting to 2.4GHz Wi-Fi
05:30 First Charge and Initial Setup
05:51 LiDAR Mapping
07:04 Splitting and Naming Rooms
08:03 Smart Room Cleaning
08:33 Vacuum Test
10:08 Vacuum Power and Water Settings
10:26 Mopping Test
11:40 Home Assistant Integration
12:48 Tuya Local and the Local Key
14:01 Local Robot Vacuum Control
14:16 Home Assistant Automations
14:40 Problems and Limitations
15:27 Final Verdict
16:04 More Home Assistant Projects


Read MoreMONSGA MR7 Pro – Does It Suck? Robot Vacuum + Home Assistant
Video thumbnail for I Waited 3 Weeks for Rain to Test This in Home Assistant…

I Waited 3 Weeks for Rain to Test This in Home Assistant…

Ever wondered if it actually rained at home while you were out? In this video, we unbox, pair and test a solar-powered Zigbee rain sensor integrated into Home Assistant.

From physical setup and initial pairing quirks to tracking real-time rainfall data on the Home Assistant dashboard, this covers everything you need to know.

Buy the sensor on Amazon:

UK: https://lasso.to/0nkoxwofdF
US: https://lasso.to/mkAHrnaVlT

Chapters:

00:00 Intro
00:38 Unboxing
00:58 What’s in the Box
01:23 Finding the Hidden Instructions
01:34 Setup Steps
02:08 Finding the Reset Button
03:36 Opening Zigbee2MQTT
03:55 Device Discovered and Renamed
04:14 Adding the Rain Sensor to Home Assistant
04:24 Rain, Link Quality, Battery and Drought Data
04:35 Finalising Setup
05:05 Finding the Rain Sensor Integration
05:16 Sensor State and Rain Intensity
05:28 Mounting the Sensor
05:46 Attaching the Device
06:08 Installed Sensor Close-Up
06:27 Testing the Sensor

Read MoreI Waited 3 Weeks for Rain to Test This in Home Assistant…
Video thumbnail for Don’t Buy a Smart Dimmer Until You Watch This

Don’t Buy a Smart Dimmer Until You Watch This

The secret to fitting large smart dimmers in small back boxes. Avoid installation problems with the lessons learned while fitting the Repenic Zigbee Dimmer.

This video follows the process of smartifying an office using the Repenic Zigbee Dimmer. It covers the unboxing, required tools and a step-by-step installation. A common back-box depth problem is solved using a spacer, followed by setup in Home Assistant and Zigbee2MQTT to configure entities, dimming modes and the device name.

Gear used:

• Repenic Zigbee Dimmer
• Dimmable LED bulbs
• Multimeter and screwdrivers
• Back-box spacer

Get 10% off from Repenic with discount code WWO. The code has no expiry.

Spacer used: https://lasso.to/ADrXP1KzL3

Chapters:

00:00 Why I’m Smartifying the Home Office
01:12 Repenic Zigbee Dimmer First Impressions
03:38 Essential Tools
04:53 Testing for Power
07:58 When the Back Box Is Too Shallow
08:28 Using a Spacer for Extra Depth
10:25 Aligning the Rings and Threads
12:22 Fixing the Nut and Washer Issue
13:41 Pairing with Zigbee2MQTT and Home Assistant
15:15 Power-Loss Behaviour and Dimming Modes
19:48 Final Verdict
21:33 10% Discount Code

Read MoreDon’t Buy a Smart Dimmer Until You Watch This
Video thumbnail for Make Your Reolink Cameras 10x Better with Home Assistant & Frigate

Make Your Reolink Cameras 10x Better with Home Assistant & Frigate

Unlock the full power of your Reolink cameras inside Home Assistant.

This video walks through adding Reolink cameras, enabling 4K streams, integrating with Frigate, setting up Go2RTC, configuring masks, zones and alerts, adding PTZ control, and using the Advanced Camera Card to build a dashboard.

Whether you’re tracking birds, cows, cars, people—or squirrels pretending to be mice—this guide shows how to get the best performance from Reolink, Frigate and Home Assistant.

What’s inside:

• Adding Reolink cameras to Home Assistant
• Fluent versus Clear 4K streams
• Enabling disabled entities
• Full Frigate configuration walkthrough
• Go2RTC stream setup
• Motion masks, zones and thresholds
• PTZ control and bird classification
• Using the Advanced Camera Card
• Adding cameras to dashboards
• Real-world detections including cows, birds, cars, people, foxes and sheep

Get 5% off on the Reolink official website with coupon code: WrongWordsOnporpoise5. The code is valid until 31 December 2026.

Amazon: https://lasso.to/Vzrbb9vjsD
Frigate NVR: https://frigate.video/

Chapters:

00:00 Introduction and Setup Overview
00:52 Adding Reolink Integration to Home Assistant
02:21 Enabling the 4K Clear Stream and PTZ Controls
04:39 Overview of Frigate NVR
06:07 Frigate YAML Configuration and Go2RTC
09:33 Motion Masks, Detection Retention and Object Tracking
13:52 Frigate UI Tour
19:35 Advanced Camera Card in Home Assistant
22:10 Customising Substreams, Menus and Full-Screen Views
29:17 Camera Hardware Review and Summary

Read MoreMake Your Reolink Cameras 10x Better with Home Assistant & Frigate
Video thumbnail for Beginner Installs Matter Bulbs in Home Assistant | Step‑by‑Step Setup with Jim

Beginner Installs Matter Bulbs in Home Assistant | Step‑by‑Step Setup with Jim

Today we’re installing Matter smart bulbs in Home Assistant, step by step, with Jim helping out along the way.

If you’re new to smart-home technology, this video shows the full beginner-friendly process: scanning the QR code, pairing Matter over Wi-Fi, naming devices, assigning rooms, creating groups and adding everything to a dashboard.

We also discuss the difference between Matter over Wi-Fi and Matter over Thread, why Thread devices are harder to find in the UK, and why Wi-Fi bulbs are often the cheaper and easier option.

In this video you’ll learn:

• How to add Matter bulbs to Home Assistant
• How to scan Matter QR codes
• How to name and organise devices
• How to create light groups
• How to add lights to dashboards
• How Matter over Wi-Fi differs from Matter over Thread
• Why Thread bulbs are rare in the UK, particularly with bayonet fittings
• How to control your new lights with Alexa

Chapters:

00:00 Intro
00:13 What Bulbs
00:35 Adding the bulbs to Home Assistant
06:35 Bulb 2
08:19 Create Light Group
10:00 Add to the Dashboard
10:50 Why not Matter over Thread

Read MoreBeginner Installs Matter Bulbs in Home Assistant | Step‑by‑Step Setup with Jim
Video thumbnail for Reolink TrackMix 4K Security Camera Installation | One-hand Setup

Reolink TrackMix 4K Security Camera Installation | One-hand Setup

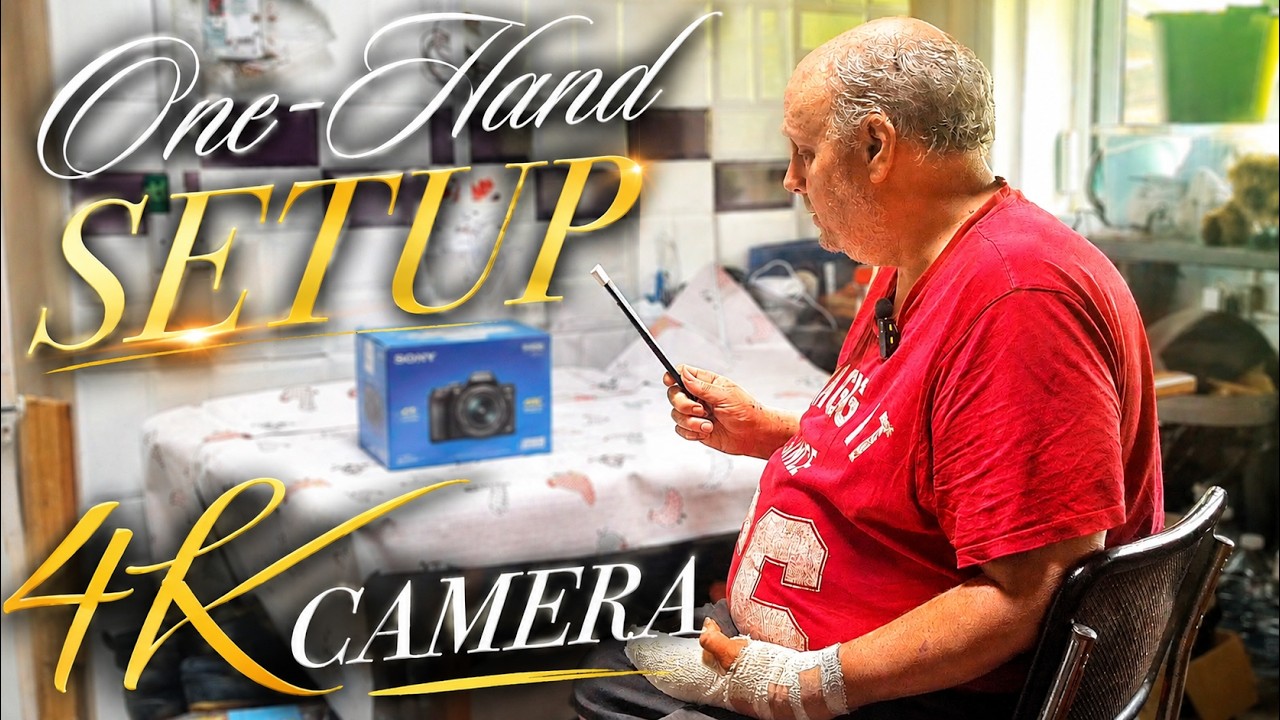
Watch a one-handed installation and full review of the Reolink TrackMix 4K PoE security camera, featuring 3D-printed waterproofing and dual-lens tracking.

The dual-lens camera can do two things at once. From unboxing to mounting, wiring, waterproofing and setup in the Reolink app, this video walks through every step of getting the TrackMix PoE up and running.

We’ll cover:

• Unboxing and first impressions
• Mounting and waterproofing the cable connection
• Setting up PoE networking
• Configuring the Reolink app and web interface
• Auto-tracking, PTZ and dual-lens features
• Real-world footage of birds, dogs and garden views
• Honest pros and cons after installation
• Tips for making the waterproof connection more reliable
• Daylight and infrared night-vision performance

Get 5% off on the Reolink official website with coupon code: WrongWordsOnporpoise5. The code is valid until 31 December 2026.

Amazon: https://lasso.to/Vzrbb9vjsD

Chapters:

00:00 Intro and Safety Warning
00:44 Unboxing the Reolink TrackMix PoE
01:23 Included Accessories and Camera Specs
02:43 Network Setup and Green PoE Switch
04:07 Plugging In and Initial Power On
05:03 Setting Up in the Reolink Mobile App
07:27 Testing PTZ Controls and Dual Lens Zoom
08:33 Configuring App Settings and Auto-Tracking
09:53 Cable Management and Waterproofing Problem
11:31 Custom 3D-Printed Junction Box Solution
14:36 Mounting the Bracket to the Exterior Wall
15:45 Finalising Cable Run and Drip Loop Setup
16:02 Enabling Web Interface
16:49 PC App Navigation and Dual View Modes
18:12 Wildlife and Bird-Watching Demo
19:56 System Settings and Schedules
21:54 Playback and Night-Vision Footage
23:55 Dog Motion-Tracking Test
24:43 Audio Test
25:25 Final Verdict and Pros/Cons
27:06 Discount Code and Wrap-Up

Read MoreReolink TrackMix 4K Security Camera Installation | One-hand Setup
Video thumbnail for How to Use Tasmota in Home Assistant: Local Control, Firmware Upgrades & Auto‑Updating Dashboard

How to Use Tasmota in Home Assistant: Local Control, Firmware Upgrades & Auto‑Updating Dashboard

Unlock the full power of Tasmota inside Home Assistant with completely local control, automatic updates, MQTT integration, and a custom dashboard that manages all your devices in one place.

In this video, we cover:

• What Tasmota is and how it works
• How Tasmota integrates with Home Assistant
• Setting up MQTT for reliable local control
• Exploring the Tasmota web interface
• Understanding modules, templates, GPIO pins and configuration
• How to safely upgrade Tasmota firmware, including minimal firmware
• Creating a Home Assistant dashboard that auto-lists all your Tasmota devices
• Building a script to update all devices at once
• Tips, mistakes, troubleshooting and real-world examples
• A quick safety reminder, because accidents really do happen

Whether you’re new to Tasmota or levelling up your smart home, this guide shows you how to make your devices faster, safer and fully local.

Links mentioned in the video:

• Tasmota Project: https://tasmota.github.io
• Blackadder’s Tasmota Templates and Device List: https://templates.blakadder.com/
• MQTT Setup Guide for Home Assistant

Comment on the video if you want the dashboard code or need help with your own setup.

Chapters:

00:00 Intro
00:34 Credits
00:54 What’s Tasmota
04:57 Tasmota Menus
12:50 I’ve Made a mistake
14:19 Tasmota on the Dashboard
19:15 Why am I hiding my hand?

Read MoreHow to Use Tasmota in Home Assistant: Local Control, Firmware Upgrades & Auto‑Updating Dashboard
Video thumbnail for Make Home Assistant Work with a USB Keypad | Full Setup, Events, Automations

Make Home Assistant Work with a USB Keypad | Full Setup, Events, Automations

Take full control of Home Assistant without ever talking to Alexa or Google Home. In this video, I show you how to set up a USB keypad on a Proxmox server, detect key events, and build powerful automations using the Keyboard Remote integration.

Perfect for anyone who prefers physical buttons, wants silent control, or needs an accessible alternative to voice commands.

What you’ll learn:

• How to install a USB keypad into a Proxmox Home Assistant VM
• How to add the USB device correctly in Proxmox
• How to find your keypad event number in Home Assistant
• How to configure keyboard_remote in configuration.yaml
• How to detect key presses using event listeners
• How to build automations triggered by keypad keys
• How to control lights, curtains, TVs and more
• Tips for mapping key codes and avoiding common mistakes

This method is useful for Home Assistant beginners, Proxmox users, silent smart-home setups, accessibility-focused builds, and anyone wanting physical controls for lights, TVs, curtains and more.

Codes:

keyboard_remote:
device_descriptor: ‘/dev/input/eventx’
type: “key_down”
emulate_key_hold: true
emulate_key_hold_delay: 0.25
emulate_key_hold_repeat: 2.0

keyboard_remote_command_received

device_descriptor: /dev/input/event3
key_code: 83
type: key_down

Chapters:

00:00 Intro
00:30 Credits
00:51 Setup the Keyboard
01:35 Add it to Proxmox
02:34 Finding the USB Key in Home Assistant and adding it
04:33 Testing it works
06:15 Making an Automation
13:03 What can it do

Read MoreMake Home Assistant Work with a USB Keypad | Full Setup, Events, Automations
Video thumbnail for Control Your PC with Home Assistant! | HA Agent Full Setup & Automations (Beginners Guide)

Control Your PC with Home Assistant! | HA Agent Full Setup & Automations (Beginners Guide)

Take full control of your Windows PC using HA Agent — send notifications, run apps, trigger media controls, speak messages, toggle lights, and even automate your computer when nobody is logged in.

In this video, I walk through the full setup step-by-step, including:

• Installing HA Agent on Windows
• Adding the HACS integration
• Creating a long-lived token
• Setting up MQTT
• Adding your PC as a Home Assistant device
• Commands (Home Assistant → PC)
• Sensors (PC → Home Assistant)
• Satellite Services (actions when nobody is logged in)
• Sending notifications to your PC
• Making your PC speak messages like: “Would you like a cup of tea?”
• Controlling media playback from Home Assistant
• Automating shutdown, toggling lights, webcam sensors, and more

If you’ve ever wanted your PC to be part of your smart home, this is the easiest and most powerful way to do it.

HA Agent documentation:
https://www.hass-agent.io/2.2/

Chapters:

00:00 Intro
00:44 Installing the Client
03:50 Install the HACS part
05:30 Shout at Dogs
06:00 Configure the Client
18:00 Doing an Automation

Read MoreControl Your PC with Home Assistant! | HA Agent Full Setup & Automations (Beginners Guide)
Reolink TrackMix 4K PoE camera installation and review by WrongWords On Porpoise

WrongWords Weekly: Reolink TrackMix with One Hand + Goodbye :8123?

I’m back. It has been a few months since the last email, but WrongWords On Porpoise has not gone quiet. There have been new videos, plenty of smart-home tinkering and, naturally, a few things that did not quite go to plan.

From now on, WrongWords Weekly will arrive on Sunday evening with Friday’s video, one other useful smart-home story and anything else worth sharing from behind the scenes.

Installing a Reolink TrackMix 4K PoE camera with one hand

Reolink TrackMix 4K PoE camera installation and review by WrongWords On Porpoise

This week’s main video follows the complete installation of the Reolink TrackMix 4K PoE camera. That means unboxing it, getting it onto the network, mounting it outside and trying to make the waterproof connection genuinely waterproof — all while working one-handed.

The TrackMix uses two lenses at the same time: one gives you the wide view, while the second can zoom in and follow whatever has caught its attention. I tested the PTZ controls, auto-tracking, daylight footage, infrared night vision and, naturally, whether it could keep up with the dog.

The supplied waterproofing did not suit my cable run, so the installation also involved a custom 3D-printed junction box and a proper drip loop. It is exactly the sort of small detail that tends to decide whether an outdoor-camera installation stays reliable.

Watch the Reolink TrackMix installation

Home Assistant is dropping :8123 — but only for new HAOS installs

Home Assistant 2026.8 changes the default web port for new Home Assistant OS installations from 8123 to the standard HTTP port 80. In practical terms, a fresh HAOS system should open at an address such as http://homeassistant.local/, without adding :8123.

This is not a forced change to every existing installation. Home Assistant Container continues to use port 8123 by default, and an existing HAOS setup will not simply have its port changed underneath it.

  • Fresh Home Assistant OS installation: port 80 by default.
  • Home Assistant Container: port 8123 remains the default.
  • Existing users: check before changing anything.
  • If you change the port, update the URL saved in the Companion app.
  • If port 80 is already occupied, Home Assistant may continue on 8123.

You can manage the HTTP server under Settings → System → Network. Home Assistant restarts after the setting is saved and gives you five minutes to confirm it; otherwise, it rolls back to the previous working configuration.

Read the official Home Assistant HTTP documentation.


Thanks for reading. If there is something you would like me to test, break or explain in a future video, you can reply to the email or leave a comment on YouTube.

Some product links may be affiliate links. If you buy through one, WrongWords On Porpoise may receive a small commission at no extra cost to you.

Read MoreWrongWords Weekly: Reolink TrackMix with One Hand + Goodbye :8123?